Category Archives: painting

Works In Progress

studio shot lisa kairos


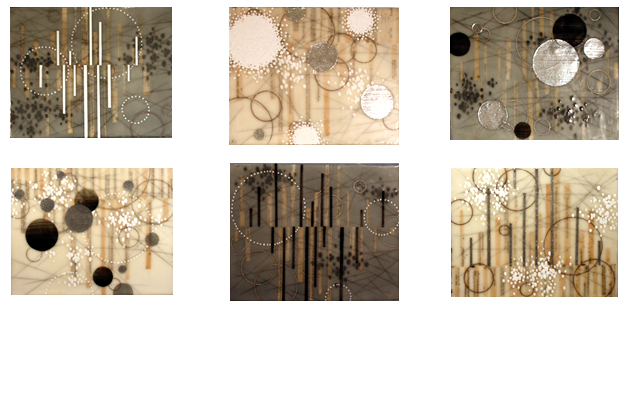
I’ve been hard at work in the studio.  Here is a look at a larger piece in progress, and some small pieces lined up.  The small pieces were a challenge for me (they are 8″ x 10″), because I really prefer to work larger.  I think my paintings are generally more successful on a large scale, but this time around I tried approaching the small work a little differently.  I treated each as if it were a small, experimental piece of jewelry.  I found that taking this approach naturally adjusted the scale that I worked at, and kept me from trying to jam in too much imagery, a common problem for me when I try to work small.  These six pieces will be available at Hang Gallery in December.

six new paintings lisa kairos


Here’s another view of my studio work table…

studio shot lisa kairos


This is something I often do, especially when I am trying something new.  I’ll find a way to “mock up” the next element in a painting.  This is especially valuable to me because when I start a painting, I only have a vague idea of where I want it to go, and often it takes me someplace completely different.  And because I’m always working in transparencies, allowing each layer to show as I build the image, it is especially important to me that I respond to the image by adding each layer in the most aware, informed way possible.  By trying out different elements before adding them to the painting, I can be a little more efficient, and often this process leads to innovations that I may not have thought of otherwise.  It also allows me to make little adjustments, sometimes minute, that make a big difference in the compositions.  These yellow circles may or may not be added- I haven’t decided yet.

Overall, I’m having a productive month in the studio so far…

Whatever Works…

The other day I was working in my studio, and this was the scene… and I thought, “How strange this looks!” So I ran to get my camera to share it with you all. I’m so fascinated by other artist’s processes, and the unusual ways that we problem solve when we are trying to get an idea out of our heads and onto the image. Encaustic is such a “new” medium in it’s current usage, and as I meet more and more artists using wax in their work, I am struck with how we are inventing it as we go.

I also thought this was funny because I’m often told that my work is delicate or ethereal, and yet the process is so… scrappy. I knew here that I wanted a large, white circle on the painting, but I didn’t know what to use to guide the circle. none of my usual objects were large enough. And then the garbage lid called to me from across the studio…  “Me! Me! Use me!”

So I did.

Studio Update: Fire

DSCN0082

Meet my new best friend in the studio. I can’t believe it’s taken me this long to get on board with a torch. I’ve procrastinated about it for months, and didn’t realize that underneath that procrastination was fear. Until I was in Carmel for the IEA retreat in October, and was faced with a bevy of torches, waiting to be tried. It was the last morning, and a wonderful demonstration had been given by Pamela Blum. We were invited down on the floor to try out some of the techniques she had demonstrated, and I found myself hesitating around the torches. I hadn’t even realized I was afraid of them until that moment. Linda Womack saw me, and must have sensed my trepidation; she rescued me with a two minute lesson that has cured me of my torch phobia! 

I went out as soon as I could and purchased a basic torch, with a few necessary frills: an adjustable nozzle, and an automatic ignition trigger. It’s a Bernzomatic propane torch from Home Depot, and it cost about 35 dollars. 

DSCN0078

I don’t know how I got along without this thing before! It works so well for every application, that I haven’t pulled out my heat gun a single time. It is much more gentle than the heat gun, and doesn’t move the wax around nearly as much. I can even fuse lightly while a large piece is upright on my easel. I think it produces a glossier surface than my heat gun did, too.

And the best thing about it is-  its fast.

Well, maybe the best thing about it is that I haven’t lit my hair on fire yet. So far, so good.

Catching Up

birdbath

We don’t get a whole lot of fall color here on the mid-California coast. But I am savoring fall, anyway. This is my favorite time of year. 

After a long bout of illness this summer, I “came to” sometime in early October, and realized that my blog (among many other things) had been sorely neglected. So in the spirit of catching up a bit, here are some things I’ve been up to. I somehow managed to pull together my show here in town at Enso; we had a wonderful opening and I received loads of positive feedback. I’m now busy preparing for another show coming up in February. So, I’ve been working in my studio, if somewhat sporadically. Earlier this month, I attended the IEA retreat in Carmel, and got some wind in my sails. The retreat was wonderful, and I met many other artists from all over the country. The speakers were great- hearing Tony Scherman speak was definitely a high point for me- and members demonstrated techniques, which was also interesting. I came away inspired and full. On my drive home, I pulled over several times, because I had to write down everything I was thinking before it got away. Just download into my notebook. Somehow, talking with and listening to other painters helped me crystalize some of my own goals, which have been fuzzy for a while. 

And now, after the buzz has worn off a bit, I realize that it is fine and well to think about painting, but a time comes when it is painfully obvious that I’m doing more thinking than painting. And that it is time to shoehorn painting back into my life, an hour at a time, and re-set some priorities. It’s never ending- the process of picking oneself back up, brushing off, and walking back into the studio.

Encaustic Technique #7: Smooth Surface Tips

icing.painting

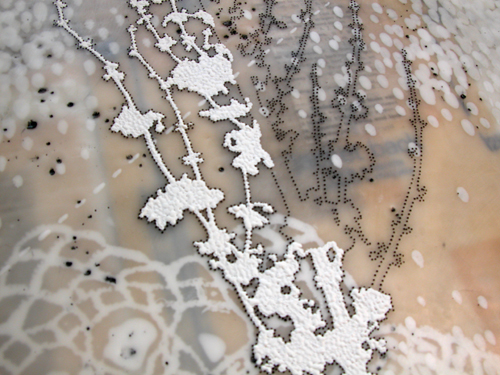
It seems that for many encaustic artists, the smooth surface is like the holy grail. Beeswax painting lends itself to almost instant surface texture. Wonderful, to be sure, and fun to exploit, but sometimes we want something glassy and smooth. Developing a smooth surface especially on any piece over, say, 12″ x 12″, takes patience and restraint. Although I cannot boast a perfectly smooth surface on my paintings, and in fact don’t aim for that, they do fall in the category of smooth rather than textured. I tend to use the smooth texture to contrast with the final touches of paint that I use to create a subtle relief (see above). Here are my tips for working toward a smooth surface in your paintings:

1. I use a heat gun to fuse, and am very careful to not over-fuse. The wax should not be blown around, or you will create a wavy surface. I’ve also read that torches can work well.

2. I use a wide (4″) hake brush to lay down layers of clear beeswax. The hake brushes are inexpensive, and have a fine texture that lays down smooth, thin layers of wax.

3. Scraping the surface from time to time with a razor blade will even out your surface and encourage subsequent layers to go on smoothly. If you use intarsia in your paintings, this will be a built-in texture regulator.

4. When I want to lay down a smooth layer, I turn the heat up on my wax slightly. Usually I keep it at 200 deg. F., but I’ll turn it up to 220 or so for brief periods. The hotter wax is more likely to smear color directly beneath it, so use this tip carefully.

5. If I am putting down more than one layer of smooth was, I alternate the direction of my strokes with each layer. I load my brush, keeping it nice and hot, then use one sweeping stroke to cover the entire width of the painting. Then I apply a stroke beneath that one, etc. When that layer is done I turn my painting a quarter turn, and put down another layer, etc. I fuse every two thin layers as I go.

6. Many artists use a “pour” method for their paintings. They tape the edges of their painting to create a lip that comes up to create a clean edge. Then pour the hot wax onto the surface. The drawback is that this can melt and/0r pit the surface of any painting beneath the pour. This is worth experimenting with, though, as I’ve seen some really beautiful work done this way.

6. Some artists use a solvent at the very end to smooth the surface. You can put a bit on a rag and rub the surface. What I’ve noticed about this technique it that it creates a matte finish. The painting must be buffed periodically to maintain a glossy finish.

7. Which brings us to buffing. You’ve created your smooth surface, and you want to make it look glassy? Clean, lint free rags work. I like to use white t-shirts that I get from the thrift store, wash and dry, and then cut up. Another option is to use chamois, which is completely lint-free, and can work up a high shine. You don’t need anything but your buffing rag and some patience. Work on small sections at a time, rubbing lightly in small circles. This is a great way to “polish” your finished piece.

What about you? do you have any smooth surface tips you’d like to add? Leave a comment, and add to the list.

“New Works ’09” show at Enso this month

winter.lowres.72dpi

I’m happy to share with you all that I’ll be hanging a show of new work at Enso gallery this week, which will run through the month of September. Enso is actually a yoga studio as well, run by an amazingly generous and creative local couple, and they run a very nice gallery space, right by the ocean here in Half Moon Bay. So if you are in the area, come check it out. 

Where:  Enso, 131 Kelly Ave. Half Moon Bay, CA

When: Please join us for an opening reception September 12, 4-6 p.m. There will be light food and drinks. The show will run the whole of September. Check the schedule at http://www.ensohmb.com for gallery availability. Generally, the gallery is open to the public before and after yoga classes. 

If you are coming from out of town, and want to make sure that you see the show, email me directly, and I’ll try to arrange a time to open the gallery for you. 

Hope you can make it!

New Work #14: Acrylic, Etc.

winter9.lowres.72dpi

Challenging work, this. I’ve been trying to translate some of the same ideas I’ve been exploring in encaustic into my acrylic mixed media work. The pieces seem related, but distinct as well. The same problems come up, but I have to solve them with a different language of solutions, as I move between the two mediums. I feel as though each new painting progresses the conversation a bit further, without a whole lot of repetition from piece to piece. 

winter7begin.lowres.72dpi

You can only faintly see the embroidered word “Begin” in the painting above.

winter11still.lowres.72dpi

It is difficult to see in the above image (these are large-ish paintings, and the low res image doesn’t quite do them justice), but I’ve started using tiny dots of paint (the black circles above) much like I use in the encaustic pieces, but to different effect.

I’m off to the redwoods for a week of camping, swimming, sunning, and hanging out with good friends. Have a great week!

New Work #13: Encaustic

winter14.lowres.72dpi

Things have been productive around here, if a bit intermittent. You’ve seen peeks of these works in process these last few months. Here are the finished pieces. The above piece is encaustic, measures 30″ x 40″, and is titled “Winter #14”.

winter10.lowres.72dpi

“Winter #10″, 28″ x 28”, encaustic mixed media.

winter6.lowres.72dpi

“Winter # 6″, encaustic mixed media, 28″ x 25”. 

I’ll update with the latest acrylic mixed media work tomorrow.

Experiments In Wax and White

tablecloth1

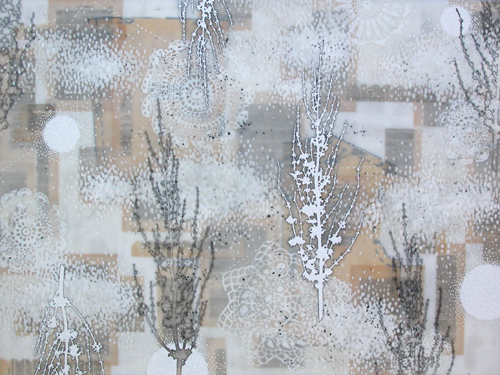
I’ve been having some fun in my studio this week experimenting with wax inlay (intarsia). Here are some of the results-in-progress.

tablecloth2

First, I tried putting oil paint into the texture and doing a wipe, but it didn’t work as well as I had hoped, so I tried filling with wax and scraping back, and I’m much happier with it. I like using intarsia in my underlayers, as I like to imagine that they are more stable, and an oil wipe in the last stages of a painting. But, Oh! The scraping- my fingers don’t like it much. I need to do a serious perusal of my local hardware store for a razor holder that works well for this. I took good photos of the intarsia process this time, so I’ll do a technique tutorial on it soon.

whitedetail

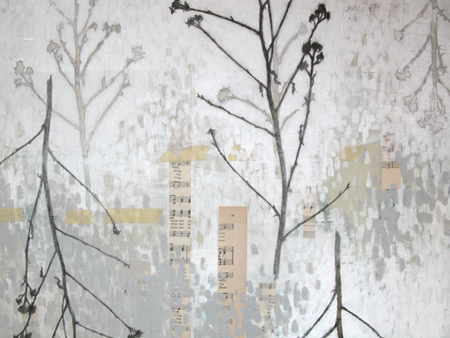
Above: a detail of a larger acrylic painting. I’ve been trying some new things with acrylics, too…. laminating milky, transluscent papers into this painting, tracing some of my field sketches, and using a graphite paint that I found recently. It is such a good exercise to try to explore the same aesthetic and formal concerns as the white encaustics, but it a radically different medium. I think it keeps things fresh all around, with each medium informing the other. Well, we’ll see. I don’t think the above painting is really successful in the way I want it to be, yet, but I’m going to keep on playing with it. I’d love for it to segue into a new (and parallel) body of work.

And I’ll leave you with one last image, something I picked up on a walk the other day. I don’t know what my neighbors thought, with me traipsing through the neighborhood with my dog and a dead bush, but I love it- it’s color and form- and can’t wait to take an hour or two and draw it from different angles. 

shrubskeleton

P.S. I’m going to the opening for “Working in Wax” tonight in Walnut Creek (see announcement below) and am so excited to see so much encaustic work!